

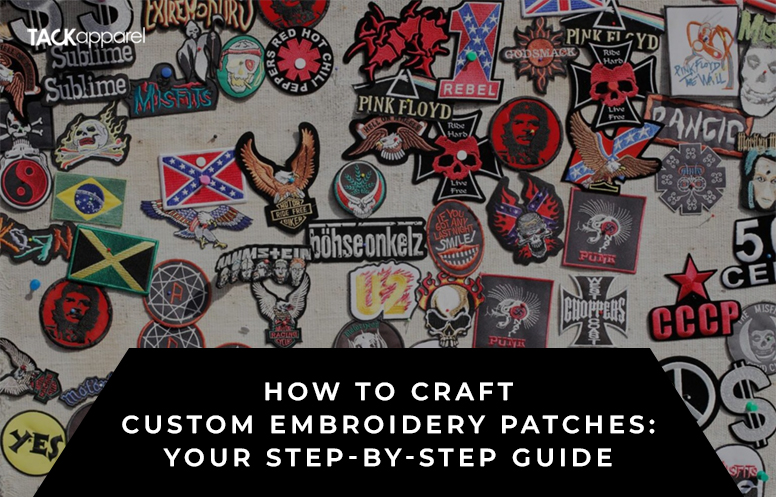
It takes time and thread to create unique patches using an embroidery machine, but it’s a surprisingly easy undertaking once you know how.
However, newcomers to needlework might find the procedure a little confusing.
How, for instance, do you create an iron-on patch? Do you need to embroider on fabric or can you just use a stabilizer? How to make an embroidery patch design or size the patch properly?
No more worries! Here is a guide on how to make embroidered patches, regardless of the type of patch you wish to embroider.
How do You Explain Embroidery Patches?
A cloth backing and thread are used to produce an embroidered patch, which is also referred to as cloth badge embroidery. Making stitched patches is an ancient craft that was initially done by hand.
A pattern or emblem that identifies a community is included on a patch embroidery made from thread and backing cloth. Hand-stitched patches have a long history, but advances in computerized machine embroidery have made them more widely available.
What is The Advantage of Embroidery Patches?
Custom embroidered patches have the potential to be a very effective branding tool for a business when used properly. This kind of branding is very flexible and can make a business stand out and appear more reputable and sophisticated. These embroidered patches with your name on them can be sewn on or pinned on. One of the most contemporary attaching techniques is iron-on backing.
Numerous materials, hues, and typefaces are offered for custom embroidered patches. Any article of clothing might have these attachments, which are used to give the wearer a distinctive identity. The following are some of the most important benefits of using custom embroidered patches:
Cost: These attachments are less expensive than direct embroidery. The process of decreasing costs has also benefited from new sewing technologies and personalized designs. They are the most economical choice.
Professional appearance: Uniforms with personalized patches exude audacity and convey refinement and professionalism. They make it simpler to communicate with clients and provide a personal touch.
Uniqueness: Businesses that seek to promote their brands or products might benefit greatly from their distinctiveness in the marketplace. They might enable a firm or corporation to promote itself innovatively and distinctively, making it stand out from the competition.
Shapes and Sizes: These patches are excellent because they come in a variety of designs, shapes, and sizes. Making patches for jackets, shirts, sweatshirts, hats, and other items, they are simple to apply.
Durability: They may go through multiple cleaning and drying processes without losing their aesthetic appeal or turning dull. They can also be used for a long time in industries with high activity levels, such as manufacturing, hospitality, and healthcare.
Multiple alternatives: We’ll give you a range of possibilities for solutions. We may order custom embroidered patches from you in a range of colors and materials. Additionally, it can organize your promotional activities effectively and produce marketing materials for your business, such as hats, coats, and bags.
Advertising: Custom patch-making on clothing serve as walking billboards and are a free form of advertising.
Custom embroidered patches help people and businesses convey their ideas and effectively stand out.
What Kind of Fabric Works Best For Embroidering Patches?

To make embroidered patches, a sturdy surface is necessary. The stitching and artistic designs are supported by a sturdy backing material, which also keeps the patch from coming loose or slipping off over time.
Choose a material that is supportive and durable because some materials are more suited for this use than others. To ensure that your design keeps looking beautiful even after being worn frequently, choose a material with low absorbency.
If you want your patch to last, be sure to use a backing adhesive that is the proper size and form.
Heavy twill cloth with a particular patch backing works best as a material for stitched patches. This means that after you finish the embroidery, you do not need to go through the extra processes of adding interfacing and iron-on fusible layers. These fabrics are available from internet suppliers of embroidery.
Almost any fabric can be transformed into an embroidered patch. An embroidery machine often performs best on thick, tightly woven fabrics. How to make patches by hand? You can use felt or a variety of stiff woven fabrics with ease if you intend to stitch by hand.
When making the badge, you will need to add multiple layers of backing if you decide to use a normal cloth to make your patches. Before you begin sewing, use a stabilizer, and after the embroidery is finished, use interfacing or iron-on layers.
Can Any Fabric Be Embroidered?
Typically, fabrics with thread counts of around 150, such as muslin, cotton, Aida, linen, Flour Sack, and Osnaburg, are popular options and won’t cause any issues while trying to draw a needle and thread through.
Owing to their tightly woven textiles. A sturdy surface is produced, ideal for needlework. Compared to thinly woven fabrics, these can accommodate designing your own embroidered patch that is denser and more complicated.
What Supplies do I Need to Make a Custom Patch?

The materials you need to manufacture patches depend on the method you intend to use, as patches sewn by hand will require more materials than those sewn using an embroidery machine.
You only need a few tools to hand stitch a felt embroidered patch.
- A little embroidery hoop is required. The fabric will stay tailed as you sew if you use a hoop that is just a little bit larger than the patch you want to produce.
- You’ll also need embroidery floss in your preferred color scheme. This is available online or at any sewing supply store.
- It’s vital to remember that floss comes in various textures, including cottony and satiny.
- Cotton floss is the most popular kind used for hand stitching.
- Make sure the cloth or felt you choose will fit inside your embroidery hoop.
- Additionally, you’ll need a piece of hard stabilizer to stitch behind the felt and reinforce it.
- Finally, you’ll need a pair of sharp scissors and a hand-sewing needle with an eye big enough to fit the thread.
You’ll require a wider range of materials if you want to use an embroidery machine to create patches. To make stitched patches using this technique, you do need to make an initial investment in materials and technology. How to embroider a patch by machine, while using a machine allows you to repeat dozens of the same design embroidery patches rapidly and with expert results!
- You will need an embroidery machine first. On a unique machine-held hoop, this kind of sewing machine can sew intricate patterns. The most effective embroidery machines for patch sewing are computerized and enable wireless syncing or uploading of digital files, which the machine then converts into embroidery stitches.
- To develop and edit your digital design files, you will need design software or access to an online design workspace. Many manufacturers of embroidery machines include access to this program in the price of the machine, but you might opt to buy specialized embroidery software that offers a wider variety of capabilities.
- Spools of thread in the right colors are required. To learn what sort of thread to purchase, consult the owner’s manual for your machine.
You require a sharp needle with a fine tip for the majority of crafts. This ought to be included with your device. - Professional-grade patches should be made of durable twill fabric with a crinoline backing.
- If you purchase from an internet vendor, you can acquire cloth that is already backed with the proper patch if you need a patch! To find this fabric, you can also browse specialty embroidery shops.
- If you wish to save time, you may simply purchase pre-made blank patches.
- Alternatively, you might use strong cotton or linen to make your embroidery patch cloth. It only has to have a stabilizer and fusible web applied to it by you.
You will require embroidery backing, a peel-and-stick material, for the back of your badges. - You’ll also need heat seal film to cover the finished badge for the best results.
- Finally, to apply the film, you will require either a heat press or an iron.
How do I Make Custom Patches?

Any type of base material can be used to make custom patches in almost any form you can think of. The edging can be done with any type of thread. A sharp, pointed scissor and water-soluble backing are all you need to start a custom project, even though specialized tools like plotter/cutter machines and purpose-made materials greatly speed their development.
If you are an expert with a plotter or laser cutter, I don’t need to explain How to get a patch made you can cut materials by feeding vector art into your preferred device. The manufacturing process is accessible to you whether you begin with a technology solution, use patterns for manual cutting, or work totally in the hoop.
In each scenario, the process for making a custom-cut component begins quite similarly to that of standard patches. The main difference is that you’ll be using your embroidery machines to edge the patch, therefore your files must include more than just a placement line.
You must locate or digitally create your shape with the placement line, a zigzag tack-down stitch that is just a little bit smaller than the completed edge, and a dense satin-stitch border that is about 3 mm wide and overall somewhat larger than the base material you have cut.
Use a color-matched bobbin thread for the last border to create a wraparound effect for an extra-clean finish.
Using Water-Soluble Baking
Starting with a strong water-soluble backing, both pre-cut and in-the-hoop patch-making is possible. I advise against using a film and in favor of a “fibrous” water-soluble backing. The thin coating intended to serve as a finish for textured clothes is insufficiently strong to withstand vigorous stitching without breaking or loosening.
Use layers of the thick films designed exclusively for the fabrication of patches or badges if you can’t find fibrous water-soluble backing.
Make Your Placement Stitches
Put each part on a different color change in your program so that the machine stops between stages for the easiest approach to managing the stitching phases on your machine.
When using pre-cut material, a typical placement line should be drawn using the first color of the pattern before you lightly stick your cut piece to the backdrop.
Before running the outline, lay a piece of fabric larger than your finished area on the backing for in-the-hoop hand-cut patches. After the first outline is completed, you can take the hoop out of the machine, leaving the backing hooped, and then carefully trim away the extra patch material that is outside of the line.
Use Tacking Stitches
The processes then begin to converge. Sewing that broad zigzag tacking part is the following step. You will stitch your primary pattern after your material and backing have been joined, saving the final color change for the satin-stitch run around the edges. This reduces the possibility that the item will be prematurely released from the backing due to the dense stitching of the final border.
Dissolve The Backing of Your Patch
All that remains to be done after this is finished is to dissolve the backing.
Before rinsing, trim off as much of the excess water-soluble backing from your patch as you can to expedite the rinse process.
For your particular backing, use the manufacturer’s suggested removal guidelines. My favorite backing easily disappears after a quick rinse under running water. You’ll have a clean finished edge with thread neatly wrapping to the back of the insignia once it has been rinsed thoroughly (no residue or foam, or it may get stiff or sticky later).
Patch making gives a vast array of expression options for such a basic operation. Furthermore, there is no better way to create wearable art that you may trade with other fiber artists than a patch, which is non-sized and simple to transport.
For me, what keeps me returning to emblems time and time again is the sense of being a part of and being able to shape that language of fandom, affiliations, clubs, and achievements that looked like the secret domains of some initiated few.
Two Methods For Making Embroidery Patches

We have developed two fresh approaches to creating personalized embroidery patches that take into account both our past and current technologies. Our designs are of the highest caliber, and the method we have created to produce them is groundbreaking.
Our foundation will provide you with outcomes that are high-quality and product-friendly as manufacturers with more than 60 years of experience in the embroidery industry. Each file is checked and manually scanned. They are not produced through a software automation process with subpar outcomes.
To give you a choice, we’ve created two cutting-edge layouts specifically suited to your requirements. Homemade patches and pre-made patches.
DIY Embroidery Patches
You can add your drawings or inscriptions to the patch’s outline using these skillfully digitized embroidery designs. These designs enable you to quickly and easily construct bespoke patches with any material of your choice, whether you want to make a custom patch on a single-needle machine or several patches on a multi-needle machine.
These free embroidery pattern files from the internet imitate the expert outcomes of trade boundaries, which were made with a unique machine. This copy will give your patch a tidy, professional edge. Commercial border machines are renowned for this feature.
You can add your drawings or inscriptions to the patch’s outline using these skillfully digitized embroidery designs. Create your own embroidered patch custom with any content you want at the touch of a button!
Please be aware that none of our DIY patches come with EMB files because these files cannot be resized and will only embroider at the size for which they were digitized. If you use a planner of any sort, we’ve included SVG files so you may pre-cut your patch to the appropriate size.
Step 1: Prep Your Patch
Setting up your patch is crucial. From your fabric station, you can choose any fabric. Wool, cotton, poly, etc.
One of these stabilizers will need to be used to back up your patch. Always keep in mind that the tools you use will alter how to get embroidery off a shirt to complete the following steps:
a product with fusible interfacing on one side called a no-show mesh or a two-way practical (such as tacky patch feasible stabilizer)
Step 2: Cutting Patch Design
Whether or whether you have a cutting machine will affect how you handle the following step.
- Utilization of Cutter Machines:
- If you don’t have a cutter machine, sew the fabric and stabilizer using the sewing file that came with your DIY Patch Made Easy design file.
Step 3: Adhesive Backing
Your patch’s appearance will determine which stabilizer you use.
- If a no-show mesh stabilizer is not used, you should use a spray adhesive (such as 505) to adhere to the patch’s back.
- If you use a sticky patch stabilizer, the back will be easy to peel off and have an adhesive, giving you a tacky back (hence the name).
Step 4: Embroidering Patch
There are three distinct kinds of stabilizers that you can use when embroidering on your patch, each of which has some advantages over the others.
The method you utilize will alter depending on the stabilizer you choose for your personalized embroidery patch. You can choose from the following:
- DIY Tear Away Patches
- DIY Wash Away Patches
- Prepare Patch Film
Step 5: Post-Patch Sealing
You’re nearly done! Using Post Patch Iron on Cell, you might want to seal your patch.
For a neat, polished finish, a two-way heat-activated seal called a post-patch iron-on cell is put to the back of your finished patch. It will cover up all of your jumps and cuts, give your patch a polished appearance, and make it appear as though it is still incomplete.
Ready-Made Embroidery Patches

We offer fully finished embroidery patches in our pre-made embroidery products (minus the personal design you choose to sew inside them). They are made to provide you with the most professional results while saving you as much time as they can. These patches have been prepared in full for embroidery. These are genuine products that were produced by industry standards, including authentic merrowed borders.
All you have to do is add your logo or characters to our “Perfect Placement” embroidery files, grab the patch (we’ll teach you how with the byte-sized video tutorials), and click Start.
Step 1: Hoop Your Stabilizer
To use our pre-made patches, we advise utilizing the Tear Away stabilizer.
Step 2: Embroider Placement Stitch
Run this drawing in the location where your ready-made patch will go.
Step 3: Adhesive Stitch
On the back of your pre-made patch, spray some glue. Then, using your machine, draw it back into your placement seam.
Step 4: Blanket Stitch
Your completed patch will be covered by the seam of a loose blanket, which will be stitched into place. Running the custom embroidery design from the inside keeps your patch protected.
Step 5: Remove The Blanket Stitch From The Back
Take out your hoop, then flip it over. The blanket will come out in one piece if the stitching is cut using scissors.
Step 6: Post-Patch Sealing
Take the patch out of the stabilizer and press the iron onto the seal after the patch to create a patch with a tidy backing that looks professional. Cut a little slot in the post-patch iron on the baking sheet for an easy access point once it has fused. Set your iron or hat plate at 380 ° F and hold it down for 15 seconds.
FAQs
How to Create an Applique Patch With an Embroidery Machine?
- Place a piece of water-soluble stabilizer in a hoop (WSS).
- Complete the initial round of sewing on your appliqué design.
- Over the placement stitching, spread out your appliqué fabric.
- Finish the next round of stitches.
How Many Stitches Make up a Patch?
Basic technical details. A 3-inch by 2-inch patch can have a maximum of 12,000 stitches because it is 6 square inches in size.
Final Words
We suggest using one of two techniques to make the ideal, expertly made custom embroidered patch. Our DIY embroidery patches offer design files that you should load into your embroidery machine to create an item that resembles a narrow border patch, making things simpler.
These were meticulously digitized by hand each time rather than being made by automatic software, which can occasionally produce subpar results.
Using a needle and thread, an embroidery machine, or even a standard sewing machine, you may create your embroidery patches. Using an embroidery machine is the finest method for creating traditional iron-on stitched patches. Using specialized embroidery software that converts an image into a stitching pattern for the machine, you can create or change your patterns.
If you don’t have an embroidery machine, how to make custom iron-on patches you can produce appliqué patches on a conventional sewing machine by following a simplified pattern of zigzag stitches. You can hand-embroider a felt patch and add an iron-on backing if you want to go retro.


