


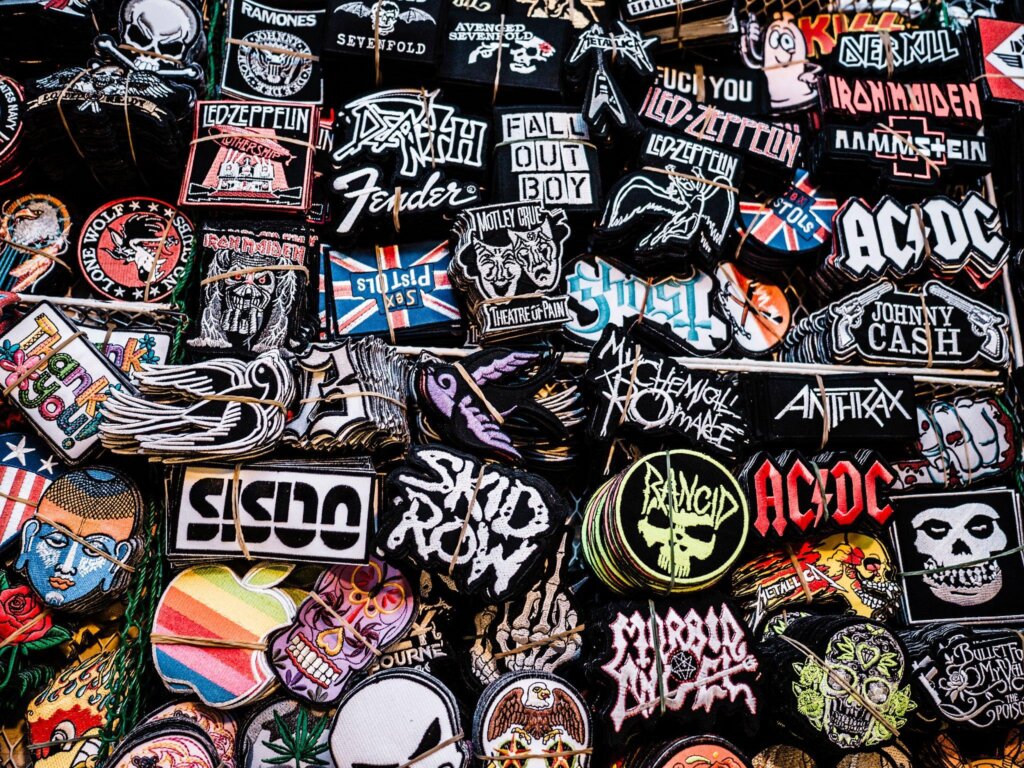
Badges and patches with embroidery are currently popular. Denim, leather, jerseys, and other materials are embellished with appliqués, woven patterns, and embroidered designs. You will discover embroidered badges and how to apply patches to clothing and accessories on this page.
There are various techniques to attach a patch to a garment or accessory, which may seem obvious to clothing producers and designers. However, some methods are better suited than others, and it is our responsibility to assist you in locating the fastest and most reliable patch application method.
To begin with, there are numerous techniques to make embroidered patch badges. Just a few examples include the fully embroidered badge, the felt-backed layered badge, the woven patch, the bullion embroidered badge, the chenille badge, printed patches, and the overlocked-edge badge. Visit our badge collection to find inspiration and quality.
There is an application method that works well for each of these badge attributes and constructions. Depending on how you want the finished product to look, you may have a choice of different application methods for some products.
Learn the 4 distinct methods for the best fabric to make embroidered patches for your clothing, and how they will affect the overall uniformity of your branding, in the following paragraphs.
What Are a Patch And Example?
The most common thing to put patches on is by sewing them onto garments. Numerous companies make their patch patterns and utilize them to spruce up t-shirts, customize headgear, dress up jeans, adorn coats, and more. Also design clothing patches with company logos, musical acts, art pieces, clubs, quotes, movies, and a variety of other interests.
What Are The Types Of Patching?
The pricing, substance, durability, and texture of patches are available in a variety of forms. There are numerous varieties Types of patches available. Here are the top 8 patches that you should be aware of.
- Embroidered patches
- PVC patches
- Chenille patches
- Woven patches
- Leather patches
- Name patches
- Printed patches
- Bullion patches
How Do You Apply An Embroidered Patch?
Your attire can be spiced up and your indie can be expressed with the help of embroidered patches. They may also be used to promote a significant company, cause, or organization.
Patches can be found on a variety of items, including jackets, uniforms, purses, and backpacks. They support the presentation of your accomplishments, personality, and hobbies.
There are some methods for attaching patches that work better than others, depending on your resources and the fabric material. For you to use your embroidered patches, this article will explain 4 different methods of clothing attachment. Let’s go through each one in more detail so you can choose which is appropriate for your circumstance.
Heat Seal
The ultimate fashion statement now in style is large, fully embroidered badges. They’re all over the place in the form of big, distinctive animal figures, cutesy phrases, and stylish emojis. The reverse of the emblem is treated in a sealant to preserve the quality and definition of the design. Embroidery produces expressive and compelling detail and texture. This serves two functions. In addition to holding the badge shape, it can be heated and applied to the garment to act as glue.
This eliminates the need for sewing lines and makes applying patches sleek and effective. Heat seal backings have the drawback of not being as robust and long-lasting as sewing. If the clothing manufactures to withstand frequent washing and use, you might wish to use more than just the heat seal to extend its lifespan.
Placing the cloth on a level surface will allow you to heat seal a patch on it (ironing boards are best). After that, you lay the patch where you want it and cover it with a thin fabric (this prevents the patch from disfiguring from the heat). How to put on iron-on patches after that, you lay the iron on the patch and apply even pressure.
You then take out the fabric from the patch after the material has cooled. Voila! Your garment is now patched.
Sewing
This is how clothing applications are typically made. Although it takes more time and resources, applying your patches is the strongest and most long-lasting method. To give your patch even more texture and dimension, use contrasting colored yarn for the sewing line. Add an embroidered or overlocked edge to your badge and sew around it during the application stage if you want the sewing to be undetectable.
Hand sewing, machine sewing, and embroidery machine sewing can be used to attach patches. Sewing ability is necessary. You’ll need a patch, needle, thread, or a sewing machine, as well as the piece of fabric you want to sew the patch onto. Compared to earlier techniques, this one is more robust.
Hand stitches a patch: Several people use their hands to put a patch together. To do that, a great deal of patience and practice are needed. To master hand stitching, you must put in a lot of effort. If you wish to use this method to attach custom embroidered patches to your headgear or clothing, we advise hiring a skilled or reliable some is familiar with hand-sewing bespoke patches.
Employ a sewing machine: Using a sewing machine to attach a patch is a little challenging. Apply a personalized patch to a shirt after learning how to put on a patch using a sewing machine. To do it successfully, pin the patch to the area where it will be sewn on, and then use a low-speed sewing machine to precisely follow the patch’s edges.
Use an embroidery machine: Most embroidery machines operate similarly. It is the method of how to make iron-on patches with an embroidery machine that is most frequently used on clothing. These devices generate forms, routes, and patterns using specialized software. Vectors are processed and designs are created by embroidery machines when they are transferred via USB.
Stitching With Applique
By applying your emblem with an embroidered sewing machine, you can give it a very professional touch and the impression that it is a genuine component of the clothing. For athletic wear, this is perfect.
In this technique you will get to know how to attach embroidery to fabric, the patch is created using a sewing or embroidery machine right on the fabric. The method encourages originality and innovation. The fabric, an embroidery or sewing machine, or a thread, needle, and patch are required.
To make an embroidery applique patch, put the fabric on the machine directly and try to design something on it. You can also use the blanket stitch, which is hand-sewn.
Glue
The sticky back glue is placed on the badge and can be used to attach the badge to the garment in any location the end user chooses. This method is popular with woven badges and temporary badge applications. Flexibility and a distinctive selling factor to draw in customers are provided by the peel-off sticker backing. The badge may be removed from the garment once more without harming it, making it a popular choice for events or promotions.
You’ll need a patch, fabric or cloth adhesive, and the item of clothing to attach a patch on. Before you start the process, it is crucial to make sure the material is dry.
The cloth is first laid out on a flat surface while the placement of the patch is chosen. After applying the adhesive to the patch, wait two minutes for it to dry before putting it where you want it.
However, some patches have glue on the back that sticks. With this kind, all you have to do is peel it off and position it where you want it on the cloth.
What Is the Best Way To Sew a Patch?
With the help of embroidery patch instructions, you can apply a patch in less than an hour. From threading your needle to tying off your thread, we’ll walk you through every step of the procedure. Even a novice may master this simple method of hand sewing. Your patch can be attached to your jeans, purse, jacket, or anywhere else you like. Continue reading to learn how to apply patches, whether you’re fixing a tear or simply adding flair.
Choose The Placement Of Your Patch
Making a precise location decision for your patch should be your priority. Does it conceal a tear? Is it intended to rest on a knee or an elbow? Pick a location where you want to sew it. Make sure the patch is big enough to cover the hole or rip if you are covering up a tear at this stage.
Resolve a Tear
Before you begin sewing your patch, tidy up the area where the tear will be hidden. Any white fluff or thread that develops near the tear should be cut off.
The Patch Uses Pins Or An Iron
Take a look at the patch’s reverse. It’s an iron-on patch if it seems shiny or has a thin paper covering it. This implies that you could theoretically apply the patch and go. Iron-on patches, however, will disappear after a few loads of laundry. Sewing down even iron-on patches is an excellent idea because of this.
While positioning it for sewing, an iron-on patch is useful. Apply the patch using the instructions that come with it. As you sew it on for more durability, this will keep it in place.
If you have a sew-on patch, you should pin it down with sewing pins. Because of how thick the patch is, this will be awkward. To secure the patch, use the fewest number of pins possible.
Thread The Needle

It’s time to begin sewing your patch on! Depending on the effect you want, choose a thread that either contrasts with or matches the color of your patch. (Here, contrasting thread color is employed.) Take out your thread and needle, and thread it. Double the thread, then knot it at the very end.
Begin The Backstitch
Pushing the needle up through the fabric and the patch to begin your backstitch and bringing it all the way through to place the knot on the incorrect side. On your patch, you can begin sewing wherever you choose.
As you stitch your patch down, you risk running out of thread. That’s okay, just tie it off and continue with a new thread where you left off.
Step Up Your Stitching
By inserting your needle into the cloth and placing the patch 1/4 inch to the right of where your needle was initially raised, you can create a backstitch. Don’t stop pushing.
Bring the needle up now 1/4 of an inch to the left of the initial stitch. In the same hole where you started, re-insert your needle.
Once you’ve returned to the beginning, keep backstitching. As you reach each pin, take it out.
Complete the backstitch
It’s time to tie off the patch after you’ve finished back stitch way around it. On the fabric’s reverse, securely knot your thread. For more security, you can double or even triple-knot it.
Remove The Threads
You are now prepared to snip your threads after tying your knot. You are now prepared to display that new patch! You won’t have to worry about it slipping off in the wash because you sewed it on. Only if you choose to delete it will this patch be removed.
FAQs
How are embroidered patches made?
The surface of the fabric can be attached to them using a variety of techniques. Embroidered patches can be sewed on, ironed on, or applied using more contemporary techniques like Velcro backing and dryer heat-activated glue.
How do patching and appliqué differ from one another?
Small pieces of the fabric are cut out and sewn together in both patchwork and appliqué. Comparable to appliqué, patchwork joins parts together without the use of a backdrop fabric. Underneath patchwork, stitches may be felt, whereas appliqué hides them with a cloth.
Final Words
Fashion-forward people are finding innovative ways to wear their embroidered patches as they are making a significant comeback.
So, we discussed the various methods for how to attach patches. Additionally, we provided some advice on how to embroider patches.
We hope this information about how to get embroidery off a shirt was helpful. If any new strategies, approaches, or resources are discovered, we will update this article.


